DIY Skein - Tutoriel écheveaux

DIY skein /Tutoriel écheveaux - chez violette
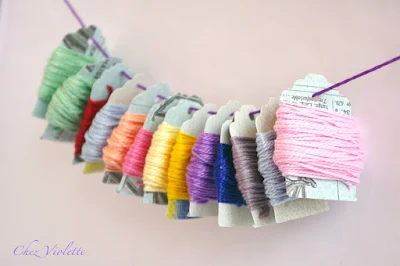
Echeveaux de fils très bien rangés :) - Tidy skeins :)

Quand on achète des écheveaux cela ressemble à ça :
When you buy skeins, it usually look like that:
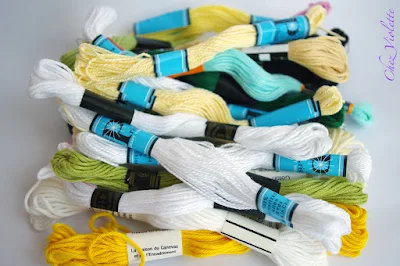
DIY skein /Tutoriel écheveaux - chez violette
Echeveaux tout neufs
Brand new skeins

Mais, une fois utilisés, cela peut très vite ressembler à ça :
But, after using them, it looks like that. Damn you, skeins!
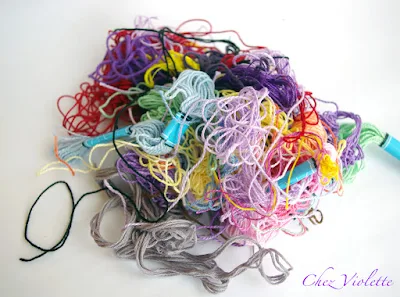
DIY skein /Tutoriel écheveaux - chez violette
Echeveaux quelques temps plus tard...
Some times later...

Alors pour 2013 on dit stop aux noeuds et fils entremêlés qui trainent au fond de nos tiroirs !
Aujourd'hui, nous allons faire de jolis écheveaux.
Say stop to those knots and tangled threads in 2013! Today, we'll make some neat skeins...
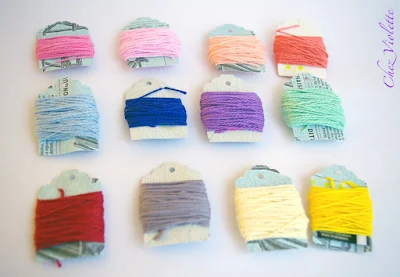
DIY skein /Tutoriel écheveaux - chez violette
Echeveaux réalisés à partir du tas de fils tout emmêlés (sisisi :-))
New skeins made from those tangled threads you saw earlier. Much better, isn't it?
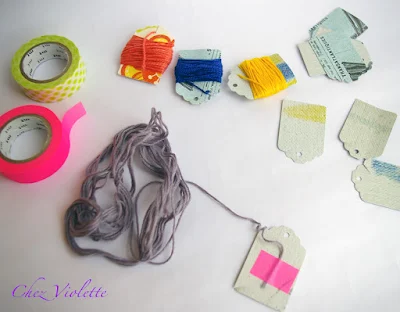
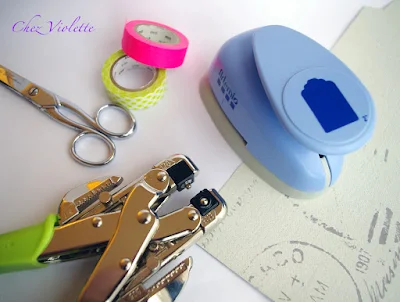
Pour ce faire, il faut :

  • du masking tape (ou du scotch), 
  • du papier cartonné fantaisie, 
  • des ciseaux ,
  • Optionnel : une perforatrice en forme d'étiquette, une perforatrice pour le petit trou. 
You need:
  • masking tape (or rubber tape),
  • some fancy cardboards,
  • scissors,
  • optional: a tag craft punch.


DIY skein /Tutoriel écheveaux - chez violette
Le matériel
What you need

1. Découpez dans le papier cartonné fantaisie une forme d'étiquette (vous pouvez vous aider d'une perforatrice). Personnellement je rajoute un petit trou sur le dessus pour pouvoir accrocher mes écheveaux par la suite. 
Cut the fancy cardboard in a nice tag shape (you could use a tag craft punch if you've got one). I drill a hole on the top of the tag so I can hang the skein once it's done.


2. Faites une encoche sur le côté pour pouvoir y coincer la fin du fil. Cut a notch on the side to hang the end of the thread.
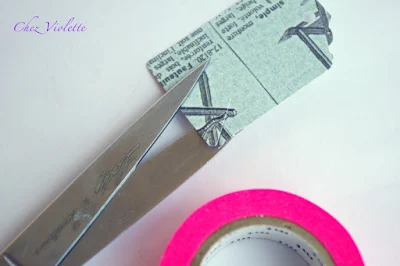
DIY skein /Tutoriel écheveaux - chez violette
Découpe de la forme
Shaping the cardboard
3. Scotchez votre fil sur le carton. Tape your thread on the cardboard.
Du masking tape sur le fil
Use the masking tape on the thread
4. Enroulez tout votre fil de façon régulière autour du carton. Roll all your thread in a nice tidy manner around the cardboard.
DIY skein /Tutoriel écheveaux - chez violette
Enroulage du fil autour du carton
Let's start rolling the thread

 5. Insérez la fin du fil dans l'encoche. Insert the end of the thread in the notch.
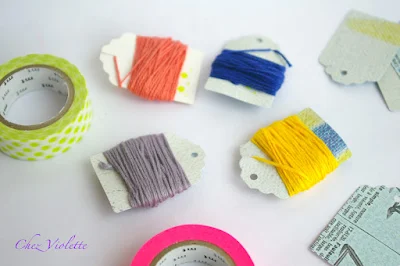
DIY skein /Tutoriel écheveaux - chez violette
Le fil est inséré dans l'encoche
The thread goes through the notch

Et voilà, maintenant vos restes de fils sont bien rangés et utilisables facilement.
Here you are! Now all your threads are tidied in a nice skein.
DIY skein /Tutoriel écheveaux - chez violette
C'est fini !!!!
That's done!!!!

************************************************************************
Do you like my DIY?
Support my small business and check my handmade shop.

Comments

  1. Très joli blog, belles photos, et diy pratique et bien pensé!!!

    ReplyDelete
  2. Perfect! I don't need these for yarn or threads but a larger version would work great for my button garlands! Nice to see you on the Farmhouse Treasures Team blog post thread.....I was so alone there for awhile!

    ReplyDelete

Post a Comment

Popular posts from this blog

Tuto Etui de téléphone portable au crochet - Crochet Phone case DIY Pattern

Aujourd'hui, je vous propose de réaliser un étui pour téléphone portable au crochet. Today, I propose to make a DIY : a crochet phone case. Pour ce faire, il faut /  We need : ♥ du coton en 4 couleurs différentes : rose pale, rose foncé, vert, bleu ciel - cotton with 4 colors : pastel pink, dark pink, green and pastel blue. ♥ un crochet n°3 - a hook number 3 ♥ un joli bouton - a cute button ♥ une aiguille à laine - a wool needle ♥ des ciseaux - scisors ♥♥♥♥♥♥♥♥♥♥♥ Etape 1/ Step 1 : réaliser la pochette / make the case ♥♥♥♥♥♥♥♥♥♥♥ 1.1 - Faire une chainette de la hauteur de votre téléphone / make a Foundation chain of lenght of your phone case. Par exemple, pour mon Samsung Galaxy note 3, j'ai fais une chainette de 35 mailles. For example, for my Samsung Galaxy note 3 phone I made a Chain of 35. 1.2 - 1 maille en l'air, puis une premier rang de mailles serrées. Dans la dernière maille, faire 3 mailles serrées. Puis un rang de mailles

DIY Crochet Easter Chicken - Eggcup and Egg cover - Free Crochet Hen tuto

Hello everybody ! Today we lean to make a crochet Chicken egg cover and eggcup : When you put the cover on the eggcup, you have a cute Chicken, perfect to hide eggs during Easter :) ******** This DIY is for Personal use only . I don't allow to sell the item made with this tuto, to sell the DIY or to use my text and my pictures without my autorisation. ******** Material : -A crochet size 3.5 -Cotton thread -S cissors -Yarn needle  -Motivation and time (maximum 4 hours to make it) Stitches (american lexicon) : -Slip stitch (mailles coulées) -Single crochet (mailles serrées) -Half double crochet (demi-brides) -Double Crochet (brides simples) - Treble ( doubles brides) This Crochet Chicken is easily makable by a crochet beginners. The Steps : 1. Hen Egg Cover : Row 1 -  Chain  2 - 5 Single crochet in the second chain. Row 2 - 2 Single crochet in each Single crochet around. You have 10  stitches. Row 3 - ( 1 Single crochet, 2 Si

Customiser un Tote Bag avec une dentelle de crochet - DIY personnalisation d'un sac en tissu / Crochet TOTE BAG DIY

Tote Bag avec une dentelle de crochet - DIY personnalisation d'un sac en tissu Aujourd'hui je vous propose de customiser un Tote Bag (sac de course en tissu) avec une jolie dentelle de crochet. Today, we make a tote bag with a gradient crocheted lace. The English pattern is at the end of this post ! Des couleurs fraiches Le matériel : un crochet 4 pelotes de coton de différentes couleurs. Ici pour le dégradé j'ai pris des pelotes : bleu ciel, turquoise, vert moyen et vert forêt. une aiguille des ciseaux Début de l'ouvrage : Avec l'aiguille, faire un point de feston sur le devant du sac. Vous trouverez ici un bon tuto vidéo . On commence par un point de feston Rang 1 : le premier rang est une suite de mailles serrées (le total des mailles doit être un multiple de 3). Rang 2 :  retournez l'ouvrage - 3 mailles en l'air, puis faire tout le rang en brides simples. Rang 3 :  retournez l'ouvrage - 3 mailles en l'air, pui